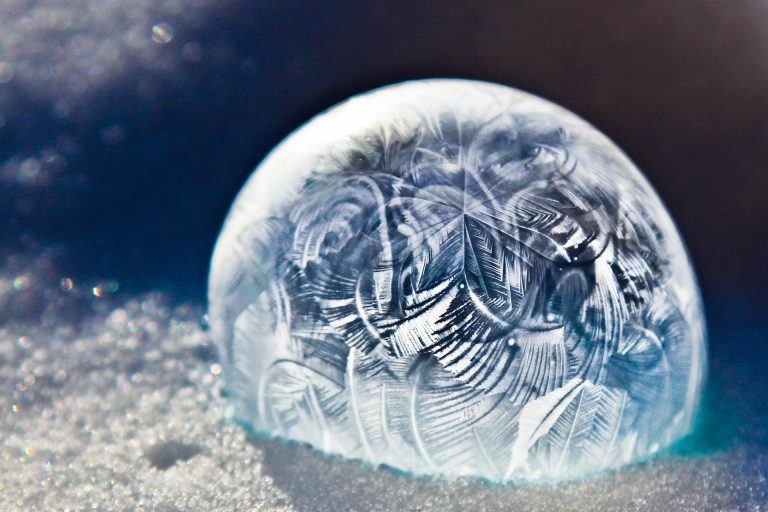
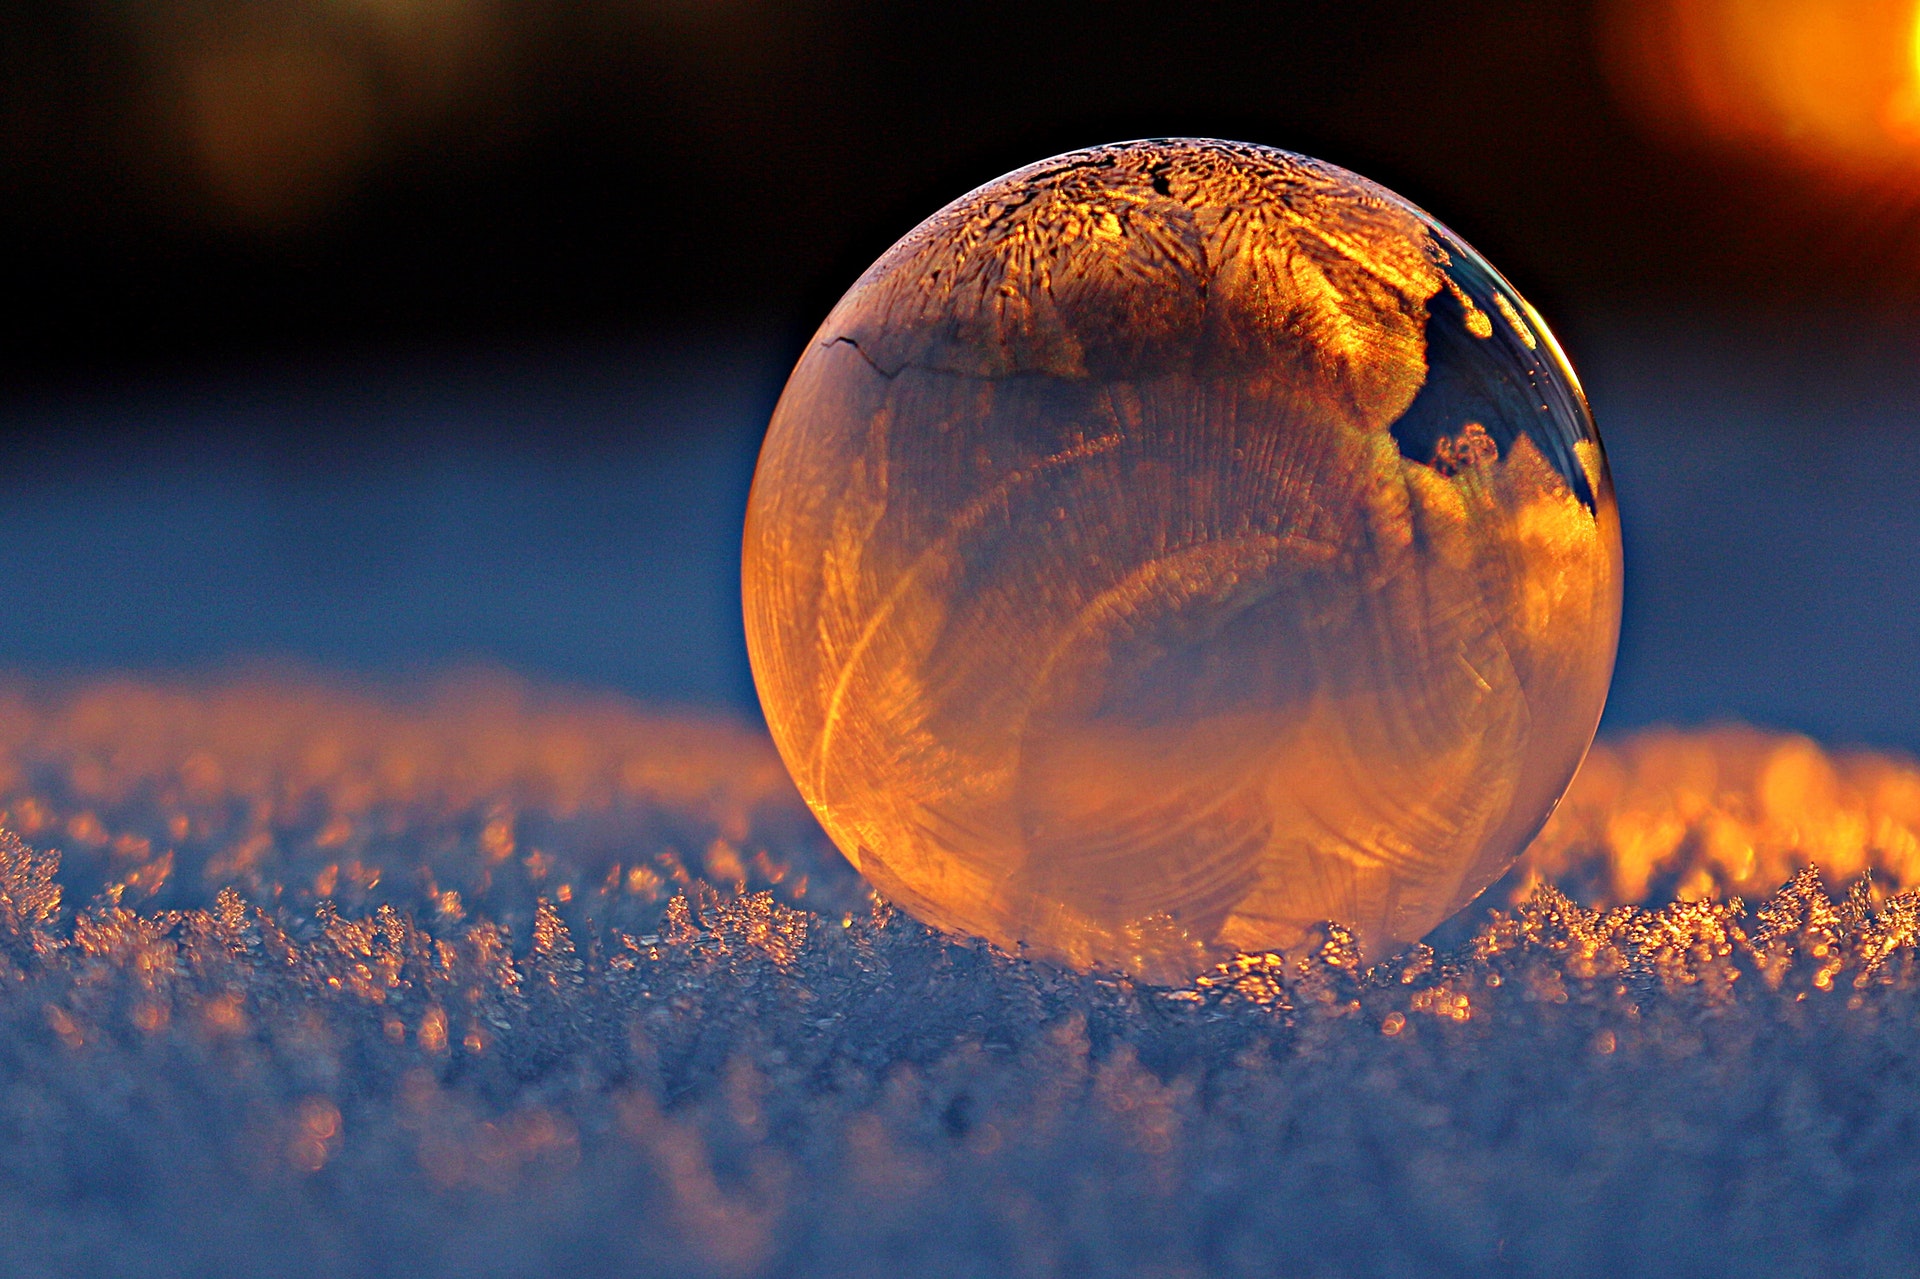
Come winter, animals hunker down, plants go dormant, and nature enjoys a stillness much like meditation. A frigid outing can be invigorating, and also offer breathtaking scenery; but don’t have to go far to enjoy the stunning beauty of a cold winter’s day. The common soap bubble just outside your home can turn into a spectacular swirl of crystalline foliage in the right conditions. Frozen soap bubbles can be tricky to get just right; but if you follow these simple guidelines and tips for success, you may soon know the magic of your own crystal ball.
Conditions needed for making frozen soap bubbles
The most important factor in getting soap bubbles to freeze is having sufficiently low temperatures, ideally below zero degrees Fahrenheit (-18 C). While they can freeze in higher freezing temperatures, they are likely to pop before crystals have time to form. Temperatures of 10 degrees and above (-12 C) are not recommended.
The second key condition is an absence of wind. Wind will prevent your bubble from freezing properly by either bursting it, or whisking it away from you. If you have the right temperatures but a blustery day, you will need to create some sort of wind block.
The third item nature can provide is a suitable surface. Blowing bubbles in the air will not give you much opportunity to observe the formation of crystals, as they will be falling and most likely shattering when they hit the ground. Fresh snow or other icy surfaces will readily accept a bubble and help it along in the freezing process.
Tools for success
If you’re excited about this experiment, you’ll want to be ready when all of the above conditions are met. Preparing your solution and wand ahead of time will ensure that you won’t be caught off guard.
Success
You are now signed up for our newsletter
Success
Check your email to complete sign up
You can use an ordinary bubble solution, or make your own. The following recipe comes from many trial and error experiments and has met with much success:
Frozen bubble solution
- 7 ounces warm water (200 mL, or just shy of a cup)
- 2.5 Tbsp corn syrup
- 2 Tbsp sugar
- 2.5 Tbsp dish soap
In a small bowl, add the corn syrup to warm water and stir until it is dissolved. The corn syrup is important in the structure of the bubble. Thicker solution gives a tougher bubble that will be less prone to breakage.
Add the sugar and stir until dissolved. The sugar aids in the crystallization process.
Add the dish soap last, because too much stirring will yield a foam rather than a liquid solution. Stir gently until it is dissolved.
Frozen bubble wand
With a straw, a plastic water bottle and a sealant, you can make the perfect wand for frozen bubbles.
Drill a hole in the cap of the water bottle the same diameter as the straw. Poke the straw through the hole and seal it with either modeling clay or a hot glue gun. Secure the lid back on the plastic bottle. Snipping small slits at the tip of the straw can increase surface area for holding solution.
There are a couple of reasons this wand is recommended. Squeezing cold air into the soap bubble is far better than trapping your own hot breath into a sphere that you intend to freeze. Also, exposed hands holding a dripping wet bubble wand are not going to last long in these temperatures; but mittened hands work great for squeezing bottles.
Blowing frozen bubbles
Now that you have your tools and your ideal conditions, you are ready to begin. Let your bubble solution chill 30 minutes in the freezer before you start using it, but don’t let it freeze. Bundle up warm, and bring a camera to capture the ephemeral beauty of your creations. Carry your bubble solution in a lidded container, with the liquid measuring at least one inch deep.
When you find the ideal location, dip the straw into the solution. Squeeze the bottle until you have a decent sized bubble, and set it gently on your chosen surface. Release the bubble from the wand before freezing begins. The amount of time you have will depend on how cold it is.
This project is fun for the whole family, but adult supervision is advised. If you do not have a climate suitable for making frozen bubbles, it is possible to re-create this experiment in your freezer. Simply follow the above steps, but for a surface, coat a small plate with bubble solution and set your bubble(s) on that. Gently place it in the freezer for 30 minutes and see what magic is made.