Most home gardeners lack the luxury of a greenhouse, and resort to purchasing plants that could otherwise have been started at home. You can save a ton of money, and have a ton of fun by starting your own plants, but waiting until the recommended outdoor sowing time gives you a late start. A simple solution to this problem: inexpensive and easy-to-make gallon jug greenhouses.
Although light plays a role to varying degrees, two things are crucial for seeds to germinate: water and warmth. Winter months in cold climates can shorten our growing season by several weeks, but don’t despair. Making gallon jug greenhouses will provide the temperature boost and ensure that you have lots of seedlings ready when planting time does roll around. Giving your seeds a head start will mean earlier produce and an extended growing season.
Supplies
- Clean, plastic gallon jugs (ask your friends to save jugs, and it won’t take long to amass a good number of them)
- Mat knife, and a sharp tool to puncture plastic (as high-tech as a power drill, or as low tech as a hammer and nail)
- Soil mix – organic, for seed starting (you can make your own with the recipe below)
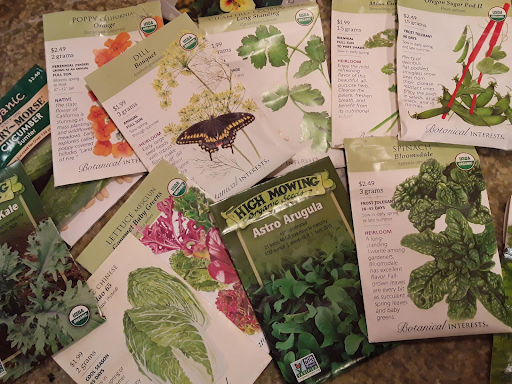
- Seeds – organic, non-GMO seeds can be purchased at your local garden center or ordered online. Trading seeds with other gardeners is a fun way to try new varieties.
- Duct tape and permanent marker to secure your lid and label your seedlings
- Watering can, with water (warm water will penetrate the soil more quickly if it is very dry, but don’t make it so warm as to harm the seeds)
Make your own soil mix
If you’re planting a lot of seeds, you may save money by making your own soil mix. A well balanced starting mix looks something like this:
3 buckets mature compost, sifted
1 bucket vermiculite or perlite, fine
Success
You are now signed up for our newsletter
Success
Check your email to complete sign up
1 bucket peat moss, sifted
2 cups wood ash
2 cups silica sand
1 cup rock phosphate
1 cup green sand.
This is a professional mix, and will provide everything your little seeds need to get started, but for simplicity’s sake, the three main ingredients are key. The aim is to have a nutrient rich, well drained, moisture-retaining medium for the little roots to explore and grow. To make watering easier, you can wet the soil gradually as you mix the batch.
Instructions
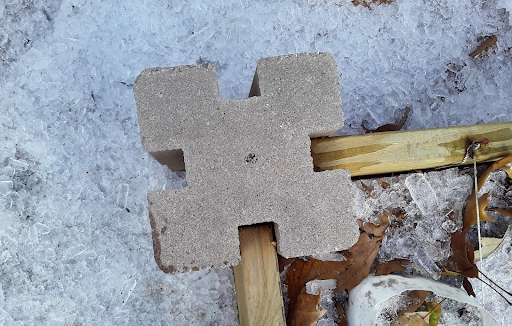
Choose a place in your garden that will get plenty of sun. You can set up a simple wooden frame with 2×6 boards to give a tidy appearance and keep your jugs in place. An empty kiddy pool or sandbox will serve the same purpose.
The clean jugs should be cut in half with a sharp mat knife, leaving one corner attached so you don’t lose the top. Puncture ¼ inch holes in the bottom of each jug for drainage.
Fill the bottoms with seed-starter soil mix, to within an inch of the rim; and examine your seed packs.
If you’re doing this in stages, start with lettuce, spinach, cabbages, peas and flowers, as they will be the earliest germinators; but don’t wait too long for a second round with summer favorites like tomatoes, peppers, squash, cucumbers and herbs. Even though they won’t germinate in cold temperatures, seeds are made to withstand the weather and are able to determine when it is safe to sprout.
Sow seeds as recommended on the seed pack, limiting yourself to one variety per container. The old adage “sow thick, thin quick” tells us to use enough seed to ensure good germination, but not to let the seedlings become crowded. A couple of seeds every inch and a half should be a happy medium for most small seeds. Planting at a depth of two times the thickness of the seed is recommended, so cover your seeds accordingly.
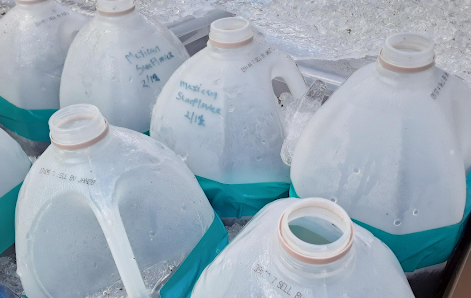
Label each greenhouse with a permanent marker before moving on to the next seeds.
Give your freshly sown seeds a good, but gradual sprinkle with warm (not hot) water to dampen the soil thoroughly. If the soil is already slightly moist, it will absorb cold water just as well. Be sure to use a gentle sprinkle so as not to wash away your seeds. Use repeated applications until the soil is moist throughout. An alternative method is to moisten the soil beforehand in a wheelbarrow or bin by gradually blending water into the mix.
Note: Root vegetables do best when sown directly in the garden, and should not be started in containers; but that’s not to say you can’t start them early. The issue is that they don’t do well with transplanting, since the root (the plant part of interest) gets disturbed and fails to develop normally. For early carrots, beets, turnips and radishes, select a day when the ground is thawed enough to sow, and then use a floating row cover to provide the greenhouse effect.
Tending your greenhouses
After your seeds are sown and watered, close the lids and seal them with duct tape. Leave the caps off – they can promote mildew and disease because of trapped moisture, and they would also prevent natural precipitation from watering your plants.
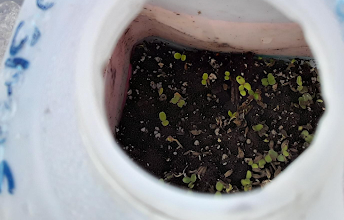
Check your gallon greenhouses periodically for signs of growth. When seedlings emerge, pay attention to spacing and thin as recommended on the seed packs. If you hate waste, you can create additional greenhouses to transplant the thinnings into, but you’ll need to be extra careful with the delicate seedlings if you want them to survive. Thinned greens are also a nice addition to salads.
Fast growing plants like tomatoes, squash and melons will benefit with being separated and bumped up to their own containers before planting out. If their roots get intertwined, they will be difficult to separate and will likely suffer in the transplanting process.
Check your last frost date against the outdoor planting recommendations on your seed packs. Many greens and peas will survive a light frost. Plant each variety out into the garden when it is safe to do so and you have established young plants. Because they were grown outside, you will not need to acclimate them as you would for plants started indoors.
Be creative
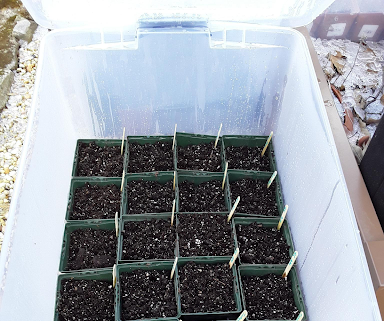
Rachel Ritter, gardener, teacher, and mother in Morristown, NJ, expanded on this idea, and made somewhat bigger “bin houses.” This method uses the same principle of locking in moisture and warmth in an outdoor setting, but allows for much greater variety in one vessel. Using the lock-on lid the bin came with, there’s no messing with tape, and the labels are made using popsicle sticks.
Rachel also had a great suggestion for collecting jugs in a short amount of time. Coffee shops, Starbucks in particular, go through several gallons of milk in a short amount of time. Give them a call and ask them to save the jugs for a couple of days and promise to pick them up so they won’t be in the way.
If you’re suffering from winter blues, there’s no better way to shake them off than getting something growing. Take a look in a seed catalog, get inspired, and start your garden today.


